Disclaimer: We sometimes use affiliate links in our content. For more information, visit our Disclaimer Page.
Project timelines are a necessary part of any successful project. They help you track milestones, deadlines, and progress. Without a timeline, it can be challenging to keep track of all the moving pieces of an entire project. However, creating and managing project timelines can be tricky, especially if you’re unfamiliar with the process.
This guide will discuss how to create and manage your project timelines. We will also provide tips and tricks for ensuring that your timelines are accurate and effective.
Let’s get started!
What is a Project Timeline?
A project timeline is an overview of a project’s deliverables in chronological order. It maps out what needs to be completed before a new task can commence and keeps everything ticking along nicely. By outlining each task and its due date, a project timeline ensures that everyone involved knows what needs to be done and when it needs to be done.
This helps to avoid confusion and ensures that the project stays on track. A project timeline can be created using various project management programs or a simple spreadsheet. Regardless of how it is made, a successful project timeline is essential for keeping any project on track.
What are the Benefits of a project timeline?
There are many benefits to creating and maintaining a project timeline. Here are just a few of the ways that a timeline can help your project:
- It helps you track progress: A timeline provides a clear overview of what has been accomplished and what still needs to be done. This can help you identify areas where the project is behind schedule and make necessary adjustments.
- It keeps everyone on the same page: By sharing the timeline with all project stakeholders, you can ensure that everyone is aware of deadlines and knows what needs to be done. This helps to avoid confusion and prevents tasks from falling through the cracks.
- It allows you to make changes as needed: A timeline is not set in stone. As the project progresses, you can change the timeline as needed. This flexibility ensures that the timeline accurately reflects the project’s current state.
- Tracks what happens and when: The order in which things must happen may be known as a project’s hierarchy of operations. Understanding the hierarchy of tasks and what must occur before anything else can happen is a critical aspect of the project management timeline. The timeline, in particular, aids in the organization and summarization of this information.
Different Types of Project Timelines
There are various types of project management timelines that you may have encountered previously. Each has its own set of benefits and drawbacks. We listed below some of the common types;
1. Gantt charts

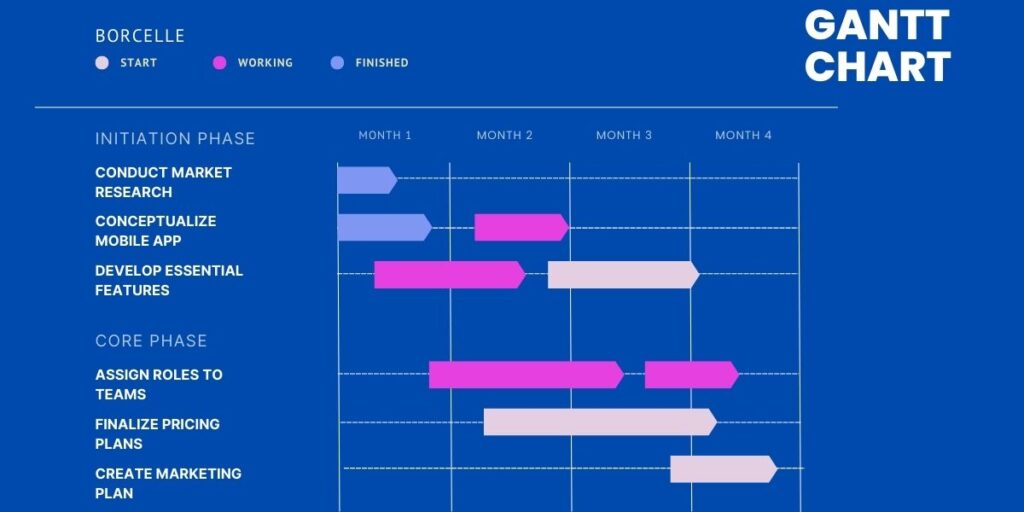
Gantt timeline charts are one of the most commonly used forms of project timelines. This is because they give a fast overview of a project, which can be very handy for project managers. For example, this type of project timeline provides an overview of when tasks need to be completed and any task dependencies that might be involved in the task. In addition, Gantt timelines are also helpful for identifying which team members are allocated to each task.
These days, Gantt timelines are dynamic and can be updated in real-time. This is incredibly useful for project managers as it allows them to see any changes that might occur during a project. For these reasons, Gantt timelines are essential for any project manager.
2. Historical Timeline
A historical timeline is slightly different from a regular project timeline because it focuses on the past instead of the future. Historical timelines are often used to track the project progress of a project over time. In addition, they can help identify any issues that might have arisen during a project and understand how these issues were resolved.
Historical timelines can also create a project record for future reference. However, while historical timelines can be handy, they have drawbacks. One of the main problems with historical timelines is that they can be time-consuming to create.
This is because they require a lot of data to be collected and organized. In addition, historical timelines can be challenging to read and understand if they are not well-designed.
3. PERT chart
A PERT chart is a project management tool that can be used to schedule, organize and coordinate tasks within a project. It provides a graphical representation of a project’s timeline that enables project managers to break down each task in the project for analysis. In addition, the PERT chart can identify the critical path of a project, which is the sequence of tasks that must be completed for the project to be completed on time.
In addition, the PERT chart can be used to identify which tasks are on the critical path and which are not and to determine how long each task will take to complete. Using a PERT chart, project managers can more effectively plan and manage their projects and ensure they are completed on time and within budget.
4. Vertical timeline
A vertical timeline is also an excellent way to track progress or growth over time. For example, it can measure time, money, or other factors. Usually, these timelines start at the bottom and go up, showing how an organization is doing. The upward motion provides a visual representation of the organization’s progress. This type of timeline can be helpful for businesses or other organizations to track their progress and see where they need to improve.
5. Biographical timeline
A biographical timeline is a great way to learn about the life of a famous or historical figure. You can understand how that person lived their life by selecting key moments and accomplishments. For example, you might choose to include birth, significant milestones, educational achievements, and death. This can help you understand what they did and how they did it. In addition, knowing this information can give you a greater appreciation for their achievements.
These are just a few of the different types of timelines that you can use. There are many other options available, so be sure to explore all of your options before deciding which one is right for you.
What is Project Management Software?

Project management software is a tool that helps you plan, execute, and track all the tasks involved in a project. Using project management software when working on projects with a team makes it easy to assign tasks, set deadlines, and track progress.
Most project management software is relatively easy to use. First, create an account and add all the relevant details about your project, such as the tasks, deadlines, and team members involved. Once you’ve done this, you can start assigning tasks and setting deadlines. You can also use the software to track progress and see how close you are to completing the project.
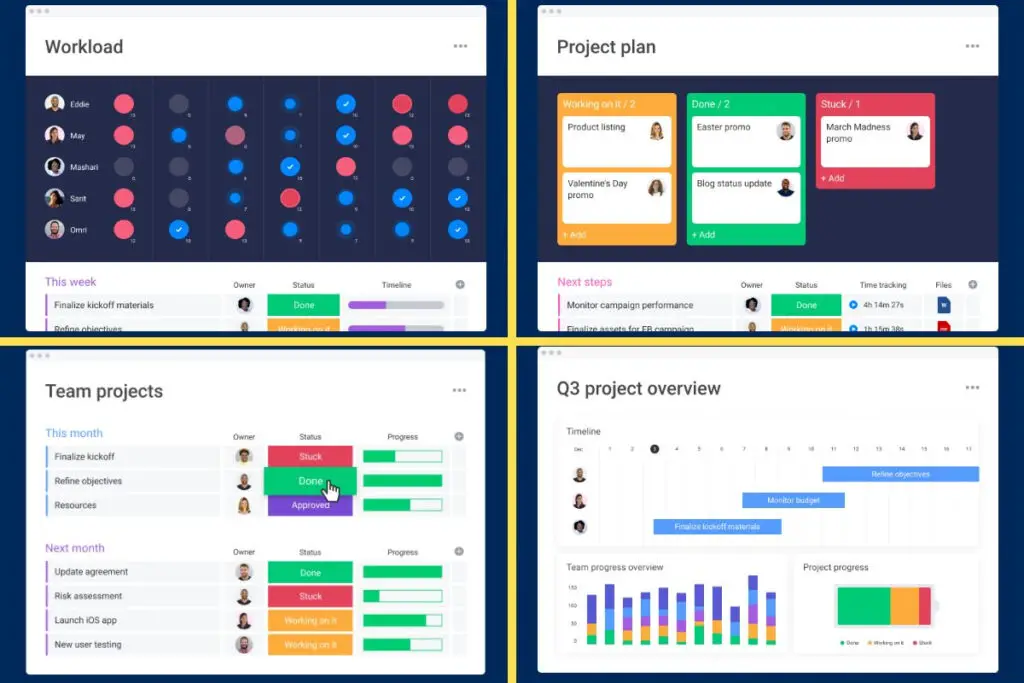
Many different types of project timeline software are available, so it’s important to choose one that best suits your needs. Some popular project management software includes Monday.com, Zoho Project, and Asana.
Related: Top 13 Project Management Software For Small Business
How to Create a Project Timeline?

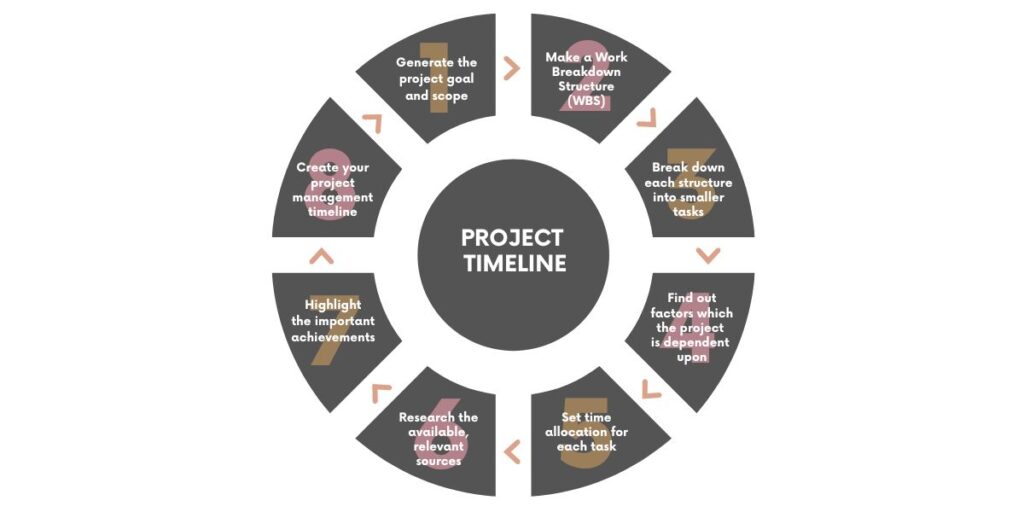
Creating a project timeline can seem daunting, but it doesn’t have to be! By following a few simple steps and using the right tools, you can easily create a timeline that will help keep your project on track.
→ Recognize the breadth of your project’s requirements
A project’s scope refers to the parameters of what is and is not included in the project. Understanding a project’s scope is crucial for determining how long it will take to complete, what resources are needed, and what deliverables are expected. A project scope statement outlines all the deliverables and can be used as a reference point throughout the project.
For example, a scope statement for a rebranding project might include “a logo and five-page website design.” By understanding the scope of a project, entire team members can better allocate their time and resources to ensure a successful outcome.
→ Break down your project into tasks
Once you have a good understanding of the scope of your project, it’s time to start breaking it down into smaller tasks. This will make it much easier to create a timeline and assign deadlines for each task.
To do this, simply list all the tasks that need to be completed for your project. Then, start assigning deadlines for each task based on its importance, and the time it will take to complete.
For example, if you’re working on a website design, some of the tasks on your list might include:
- Researching competitor websites (1 day)
- Sketching out initial design concepts (3 days)
- Creating a mockup of the home page (1 week)
- Designing the inner pages (2 weeks)
- Developing the website (3 weeks)
- Testing and launching the website (1 week)
→ Create your project timeline
Now that you have a list of all the tasks that need to be completed for your project, it’s time to start putting them into a timeline. This will help you visualize the overall project and ensure that each task is given a realistic deadline.
You can create a timeline for your project in a few different ways. For example, you can use a project management tool like Asana or Zoho Projects, which both have built-in timeline features. Or, you could create a simple spreadsheet with all the tasks and deadlines listed.
If you want to get a bit more creative, you could also create a Gantt chart. This is a type of bar chart that illustrates the start and end dates for each task in your project.
Once you’ve decided on the format for your timeline, start filling it in with all the tasks and deadlines you’ve assigned. Make sure to leave some wiggle room in your timeline in case any tasks take longer than expected to complete.
→ Assign tasks to team members
Assigning tasks to specific team members is essential when working on a team project. This will help ensure that everyone is aware of their responsibilities and knows when they need to have their part of the project completed.
When assigning tasks, make sure to take each team member’s skills and availability into account. For example, if you have a designer on your team, they might be better suited to tasks like creating the mockup or designing the website. Whereas a developer would be better suited to coding the actual website.
Once you’ve created your project timeline and assigned tasks to team members, it’s time to share it with everyone involved. This will ensure that everyone is on the same page and knows what needs to be done and when.
The best way to share your timeline is to use a project management tool like Asana or Monday.com. This way, everyone can access the latest timeline version and see when deadlines are coming up.
Related: Collaboration Strategies
Tips for Managing Project Timelines Effectively
As a project manager, one of your most important jobs is keeping the project on track. Here are some tips for managing project timelines effectively:
- Know your deadlines and make sure everyone else does too. Make sure each team member knows what is expected of them and when it is due.
- Set realistic deadlines. Don’t try to cram too much into a short time frame. That just sets everyone up for failure.
- Build in some buffer time. Things always take longer than you think they will. By building in some extra time, you can avoid those last-minute rushes.
- Keep track of progress. Check-in with team members regularly to see how they are progressing. This will help you spot potential problems early on.
- Be flexible. If something isn’t working, be willing to adjust the timeline accordingly. But, again, the goal is to get the project done, not to stick to a rigid schedule.
Following these tips can keep your project on track and avoid those dreaded timelines. Managing project timelines don’t have to be a nightmare. With some planning and flexibility, you can keep things running smoothly.
Related: Best Team Collaboration Tools
Final Thoughts
Overall, Creating a project timeline is a great way to keep your project organized and on track. Following the steps outlined in this guide, you can easily create a timeline that will help you meet all your deadlines. And by using project management software, you can easily share your timeline with your team and track progress.
Do you have any tips for creating and managing project timelines? Please share them in the comments below.
FAQ
What should a project timeline include?
A project timeline should include all of the major milestones and tasks that need to be completed to complete the project successfully. This will help to ensure that everyone involved in the project is on the same page and knows what needs to be done and when.
What is the purpose of a timeline in project management?
A timeline in project management aims to provide a clear and concise overview of the tasks that need to be completed and when they need to be completed. This helps to ensure that the project stays on track and is completed on time.
What are the 4 main processes of project management?
The four main project management processes are initiation, planning, execution, and closure. These processes help ensure that all aspects of the project are considered and completed successfully.
How do I create a project timeline in Excel?
To create a project timeline in Excel, you will need first to create a list of all the tasks that need to be completed. Once you have this list, you can create a timeline using the built-in Excel tools.
How do I create a timeline for multiple projects?
Creating a timeline for multiple projects can be done in a few different ways. One way is to create a separate timeline for each project and combine them into one master timeline. Another way is to track each project on its page in a spreadsheet or other software program. Or, you can create a Gantt chart showing the projects and their respective timelines.
How do I create a project timeline in Word?
You can use the built-in charting features to create a project timeline in Microsoft Word. First, open a new Word document and click on the “Insert” tab. Then, click on the “Chart” icon and choose the type of chart you want to use. After that, input your data into the spreadsheet that appears and then adjust the look of your chart as desired.
How do you make a timeline for a school project?
You can use the built-in charting features to create a project timeline in Microsoft Word. First, open a new Word document and click on the “Insert” tab. Then, click on the “Chart” icon and choose the type of chart you want to use. After that, input your data into the spreadsheet that appears and then adjust the look of your chart as desired.
What is a timeline in a project proposal?
A timeline in a project proposal is usually a high-level overview of the proposed project, outlining the major milestones and deliverables. The timeline should be realistic and achievable and align with the project’s overall objectives.
How do I create a project timeline template?
There are many different ways to create a project timeline template. One way is to use software like Microsoft Excel or PowerPoint to create a template from scratch. Another way is to download a pre-made template from the internet. Or, you can use a combination of both methods.
What is the importance of timelines?
Timelines are important because they help to keep projects organized and on track. They also help to ensure that deadlines and milestones are met. Without a timeline, it would be challenging to manage a project effectively.
What is the purpose of the timeline chart?
The timeline chart’s purpose is to represent the sequence of events in a project visually. It is typically used as a planning tool to help project managers and team members see the overall picture and understand how the different project pieces fit together.
What is a project delivery plan?
A project delivery plan is a document that outlines how a project will be delivered, including the timeline, milestones, and deliverables. It is used to communicate the project plan to all stakeholders and ensure everyone is on the same page.
How do I write a timeline for myself?
When writing a timeline for yourself, it is essential to be realistic and achievable. Start by determining your goal and then break it down into smaller milestones. Once you have a list of milestones, you can start to estimate how long each one will take to complete. Remember that your timeline should be flexible, as things will inevitably come up that you didn’t plan for.


